

How To Install Garage Door Remote Control
How to Install a Replacement Garage Door Opener
Updated: Sep. 02, 2022
Tips for a faster, better installation of a new garage door opener.
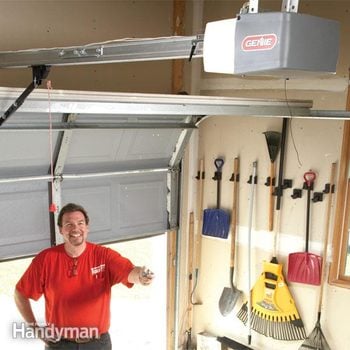
Bank check out these expert tips for easier garage door opener installation and trouble-free operation. We'll clarify the instructions that are virtually important and pass forth some pro communication that you won't find in the transmission.
Yous might besides like: TBD
Tip 1: Make certain the door parts are working
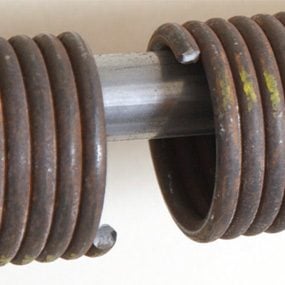
Check for a broken bound
If you have two garage doors and they get similar utilize, have the springs to a higher place both doors replaced when one breaks. The other one will probably suspension inside a year.
If your garage door is opening slowly or making a lot of racket, the problem may not be your opener. And so earlier yous buy a new garage door opener, check for cleaved or wobbly rollers and brackets. But don't supercede the bottom roller bracket yourself—the cable attached to it is under extreme tension. You lot'll need to telephone call a pro. If you lot're replacing the rollers, get nylon rollers. They operate quieter than steel rollers and price only a few bucks more. Side by side, bank check the torsion jump (mounted on the header above the door opening) to meet if it'southward cleaved. When 1 breaks, you'll see a gap in the coils. You lot'll need a pro to supplant a broken spring.
Read more than on garage door opener repair and troubleshooting.
Tip two: Check the door residue

Test the door residue
Open your door halfway and let become. If the door moves up or down on its own, the torsion bound is out of adjustment, which causes your opener to work harder and wear out faster.
Make sure the garage door is balanced. Close the door and pull the emergency release cord (always close the door first then it can't come crashing down!). Lift the door almost halfway upward and permit go. The door shouldn't move. If it slides up or downwardly, the torsion spring needs to be adjusted (or maybe fifty-fifty replaced). Adjusting the torsion spring is dangerous, and so don't endeavor it yourself (you could go seriously injure). Call a pro to accommodate information technology.
Tip 3: Cull the correct garage door opener
When buying a garage door opener, choose a 1/3 hp or 1/2 hp garage door opener for a single garage door (1/3 hp can be hard to find at some home centers). Get with i/two hp for a double door and iii/iv hp for a door that has a wood or faux forest overlay (they can be heavy!). Openers take a set opening speed, so installing an opener with a college horsepower won't open your door whatever faster.
Garage door openers are available with a concatenation drive, screw bulldoze or belt drive. Concatenation drives (a long chain pulls the door open and closed) are the least expensive, just they're loud. Screw drives (a long threaded rod drives a mechanism that opens and closes the door) are priced in the mid- range. They require the least maintenance, but they're not as quiet as belt drives. Belt drives (a rubber belt opens and closes the door) are the quietest, making them the all-time choice if you have living space above the garage. They're too the most expensive.
Tip 4: Ready the garage door opener on a ladder for easier installation

Position the opener
Identify the opener on a ladder and use flake lumber to get it at the height you need. Align the opener's rail with the center of the garage door.
Follow the manufacturer'due south instructions to assemble the opener and mount the track to the header subclass above the door. So prepare the opener on a ladder where you're going to install it. The ladder (usually an 8-footer) holds the opener in position while you measure for your lengths of bending fe. If necessary, put boards under the opener to enhance it.
Accept the door open when you install the opener (clench locking pliers onto the roller rail below a roller to keep the door from closing). It's easier to align the opener with the center of the door when the door is open up.
Tip 5: Buy heavy-duty angle atomic number 26

Hang the opener with angle iron
Don't use the flimsy strap that comes with some openers. Solid mounting means less vibration and a longer life. If the opener is more than half-dozen in. from the ceiling, attach an bending caryatid to eliminate sway.
Garage door openers come with everything y'all need for garage door opener installation. But the mounting straps that are included are often so flimsy that you lot tin can bend them with your easily. And so purchase slotted angle iron at a hardware store. Cutting it to size with a hacksaw.
Angle fe provides a stronger installation and reduces vibration, which helps extend the opener'southward life span. In an unfinished garage, attach the angle atomic number 26 directly to the face up of a joist with ane-in. lag screws. For finished ceilings, adhere angle iron forth the bottom of a joist with iii-in. lag screws. Hang the opener using 2 more lengths of angle iron and nuts and bolts. Use lock washers or thread-locking adhesive to go along vibration from loosening the basics.
Tip 6: Replace all the components
Don't be tempted to reuse the erstwhile photoelectric eyes and wall push (opener push button). The new photo eyes and wall push are designed to piece of work with your new opener.
If the wires that run from your opener to the photograph eyes and to the wall button are exposed, supersede them, as well. Those wires have probably been in your garage for 10 years or more, and they may be nicked or worn. Newer openers are extremely sensitive and won't work if a wire is damaged. It only takes about 15 minutes to run the new wire, so it'south time well spent. If the wires are protected within the wall, you don't demand to run new wire.
Tip 7: Cheque the door's opening forcefulness
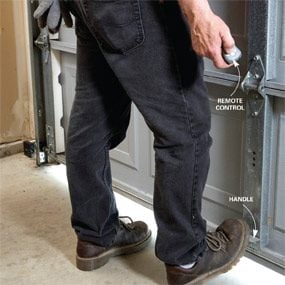
Check the opening strength
Rest your foot on the door and open up it with a remote command. The lite force per unit area from your foot should crusade the door to terminate. If it doesn't, adjust the opening strength.
Your instructions probably don't embrace checking the opening force. If your door encounters more about 5 lbs. of resistance when it'south opening, you want information technology to stop. This is an important safety feature. The "resistance" could be your finger caught in the rails.
To check the opening force, rest your foot on the door handle near the floor and open the door using the remote control. When the door lifts against your human foot, information technology should stop with very little pressure. If the door continues to open, adjust the force.
Tip 8: Fine-tune the opening and closing force
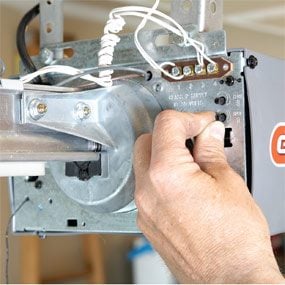
Accommodate the force
Brand minor adjustments to the opening and closing force screws, then retest the forcefulness. A ane/8-in. plow is sometimes all you need.
The opener'due south instructions probably tell you to place a 2×iv on the floor under the center of the door, then close information technology. When the door contacts the wood, it should stop and and so reverse. Proper closing force ensures that if something is in the door'due south path, the door won't crush it.
The locations of the opening and closing force aligning screws vary. Our unit has ii screws on the forepart. When adjusting the opening or closing force, turn the screw only near 1/8 in., and so recheck the force.
If the door starts to open and then stops on its own, increase the opening force. Likewise, if it stops on its own while closing, increase the endmost force. Y'all might have to make several pocket-sized adjustments to get the force exactly how it should be.
Tip 9: Utilise bulbs that handle vibration
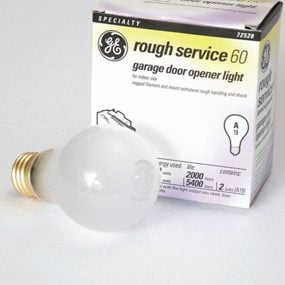
Install tough bulbs
Use "rough service" bulbs and don't exceed the wattage listed on the opener. Bulbs that are as well hot tin damage the opener.
Garage door openers vibrate, so you lot'll need special lite- bulbs that can handle it. Look for "rough service" or "garage door" on the characterization.
Be sure to utilise the wattage specified in your manual. If you use a college wattage, the oestrus could melt the plastic cover over the bulbs or even damage the circuit board within the opener.
This is one place where LED or CFL bulbs aren't the all-time pick. LEDs have a low lite output, and CFLs aren't designed to handle the vibration. And since the lights are on only briefly, the energy saved with these bulbs would be negligible.
Tip ten: Fix a reversing door
The most common problem with garage door openers is the door reversing when information technology's closing, fifty-fifty when in that location'southward zip obvious obscuring the photoelectric optics. If your closing forcefulness is adapted correctly, then the problem is almost always the photoelectric optics. The eyes are very sensitive— even cobwebs can interfere with them. Kickoff brand sure the eyes are still in alignment (some- thing may have knocked them out of whack). Then make certain the eyes are clean and the path between them is clear. Finally, look for loose wires in the eyes and the opener.
Required Tools for this Project
Take the necessary garage door tools for this DIY projection lined upward before you start—you lot'll salve time and frustration.
Originally Published: Jan xviii, 2022

Source: https://www.familyhandyman.com/project/how-to-install-a-garage-door-opener/
Posted by: willheddleggliha.blogspot.com
0 Response to "How To Install Garage Door Remote Control"
Post a Comment